
A channel that looks different in every thumbnail confuses viewers before they even click play. A brand kit fixes that by locking in the same logo, colors, and fonts across every asset you publish, so your channel looks like one consistent thing instead of a different project every week. You do not need a designer or a design degree to build one. You need five decisions made once, recorded somewhere you can find them again, and applied consistently from that point forward. This guide walks through exactly what those five decisions are and how to make them yourself with free tools.
What a Brand Kit Actually Includes
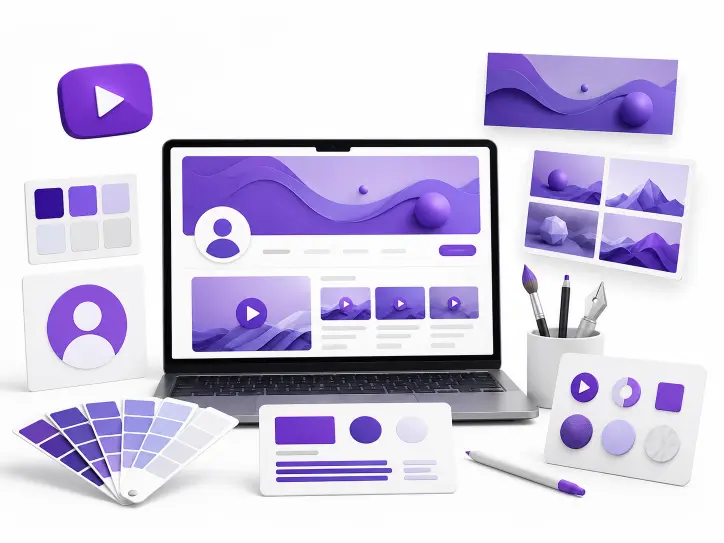
A brand kit is not a single image. It is a small, fixed set of reusable elements that every piece of channel art and every thumbnail pulls from instead of starting from scratch each time. A complete kit covers five things: a logo, a color palette, one or two fonts, a banner template, and a thumbnail template. Once these five exist, building any new piece of channel art becomes an assembly task instead of a design task, which is exactly why a brand kit removes the need to hire anyone.
Why Consistency Matters More Than Polish
A simple, consistent design beats an inconsistent one that looks expensive in isolation. Viewers recognize channels by repeated visual patterns, not by any single asset’s quality. A thumbnail that uses your established colors and font instantly signals “this is that channel” before a viewer even reads the title. Skip the consistency step and even a beautifully designed individual thumbnail fails to build that recognition over time.
Step 1: Pick a Logo You Can Reuse at Every Size
Your logo needs to work as a tiny circle in a comment thread and as a larger mark in your channel banner, so simplicity matters more than detail here. A logo built from one or two shapes and a short wordmark holds up at small sizes far better than anything with fine detail or a complex illustration.
Keep the design centered, since YouTube renders your profile picture as a circle and crops a square image to fit. Anything important that sits near the corners gets clipped. Export the final logo as a PNG with a transparent background, since that single file then works as your profile picture, a watermark, and an element inside your banner without needing three separate versions.
Step 2: Choose a Color Palette of Three to Five Colors
A color palette gives every future design a starting point instead of a blank canvas. Pick one primary color that carries most of the visual weight, one or two supporting colors, and a neutral like white, black, or gray for text and backgrounds. Three to five total colors is enough range to stay flexible without looking scattered.
Write down the exact hex codes once you settle on them. A color that looks right by eye rarely matches exactly the next time you try to recreate it from memory, and small inconsistencies between thumbnails add up into a channel that looks less unified than it should.
Step 3: Settle on One or Two Fonts
Pick one font for headlines and titles, and a second, simpler font for any smaller body text, if you need one at all. Many strong channel brands run on a single font used at different weights and sizes rather than multiple typefaces fighting for attention. Choose fonts that stay legible at small sizes, since a thumbnail font has to read clearly even when it appears tiny in a suggested video feed.
Avoid decorative or script fonts as your primary choice. They look distinctive in a large mockup but become difficult to read the moment they shrink down to thumbnail size on a phone screen, which is where most viewers will actually encounter them.
Step 4: Build Reusable Banner and Thumbnail Templates
With a logo, palette, and fonts decided, the last step turns those choices into templates you can reuse instead of redesigning from zero on every upload. A banner template locks your logo placement, color blocking, and any recurring text into one file sized correctly for YouTube’s channel art dimensions. A thumbnail template does the same for your video uploads, typically with a placeholder area for a photo or screenshot and a fixed text style for the headline.
Free design tools make this step accessible without any paid software. Canva’s free tier includes a Brand Kit feature that stores your logo, colors, and fonts in one place, so every new design you start automatically has access to the same assets instead of requiring you to re-upload a logo or re-type a hex code each time. Once the templates exist, producing a new thumbnail becomes a matter of swapping the photo and the headline text, not building a new design.
Matching Your Templates to YouTube’s Exact Dimensions
A banner template built at the wrong size causes the same cropping problems a one-off banner would, since YouTube applies the same display rules no matter who built the file. XR Save’s channel art size guide for 2026 covers the exact upload dimensions and safe area for the banner, along with the correct sizes for the profile picture and thumbnail, so your templates start at the right canvas size and skip a resize later.
Studying How Established Channels Apply Their Own Kit
Seeing a finished brand kit in action on a channel you admire often clarifies the five decisions above faster than reading about them in the abstract. XR Save’s Channel Banner Downloader pulls any public channel’s banner in full resolution, which makes it easy to study how an established channel uses its logo placement, color choices, and typography within the safe area before finalizing your own templates.
Keeping the Kit Consistent After You Build It
A brand kit only works if every future asset actually pulls from it. Save the final logo file, the hex codes, the font names, and the templates somewhere you will actually return to, rather than recreating them from memory for each new upload. A shared folder or a Canva Brand Kit works equally well. What matters is that the next thumbnail you make starts from the same five decisions rather than a fresh guess.
Revisit the kit only when your content direction shifts in a real way, not on a whim. Constant rebranding undercuts the entire purpose of building recognizable, repeatable visual patterns in the first place.
Frequently Asked Questions
Do I need design software to build a brand kit?
No. Free tools like Canva include everything needed to create a logo, set a color palette, and build reusable templates without installing or paying for design software.
How many colors should a YouTube brand kit actually use?
Three to five total colors works well for most channels: one primary color, one or two supporting colors, and a neutral for text and backgrounds.
Can I update my brand kit later if my channel changes direction?
Yes. A brand kit should evolve with real shifts in content or audience, but frequent changes undermine the recognition a consistent look builds over time.
Is one font enough for a YouTube channel?
Yes. Many channels use a single font at different sizes and weights for both titles and supporting text, which keeps the design simple and consistent.
What is the most common mistake creators make with channel branding?
Skipping the documentation step. Picking a logo, colors, and fonts once but never writing them down leads to small inconsistencies creeping into every new thumbnail and banner.
Build Your Kit Once, Reuse It Everywhere
A brand kit turns every future design task into a quick assembly job instead of a fresh creative decision. Start with the exact dimensions from XR Save’s channel art size guide, then study how an established channel in your niche applies its own kit using the Channel Banner Downloader, free, no account, unlimited use at xrsave.com.